Adding Page Numbers in Canva: A Step-by-Step Tutorial

Page numbers have finally made their way to Canva, and things just got a lot easier for multipage document creators. Discover how you can customize and manage your page numbers effortlessly, and learn the clever workaround for alternating left and right page placements—just what every DIY designer needs. Curious about why such a small feature is causing a buzz? Dive in to find out.
Jacqui Naunton // White Deer
1 Nov 2024

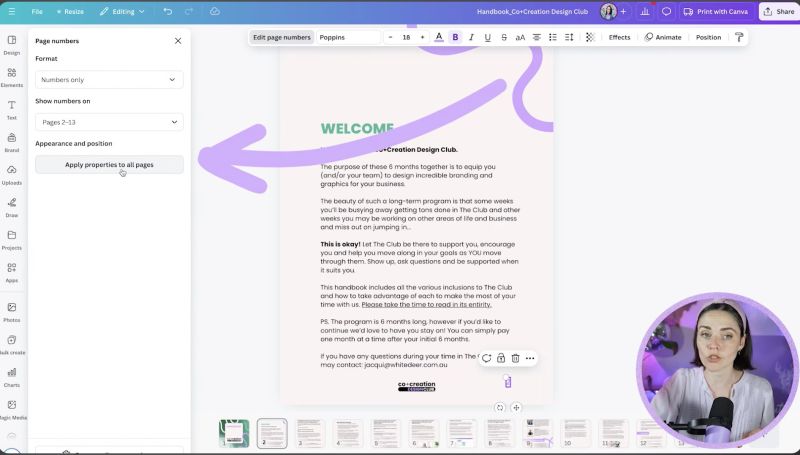
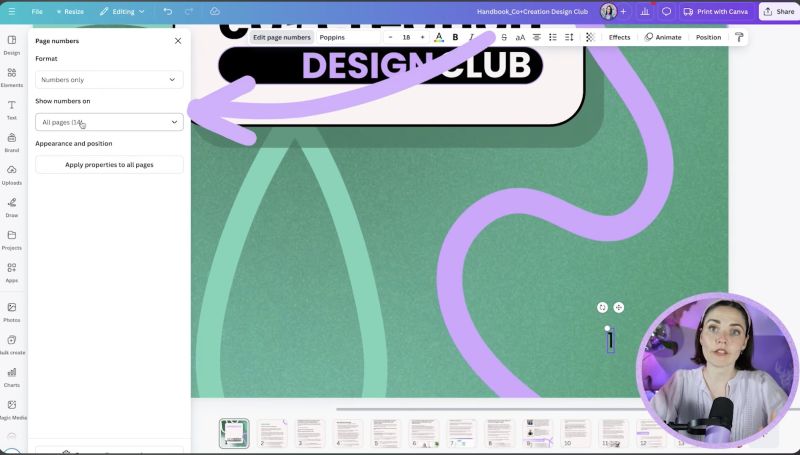
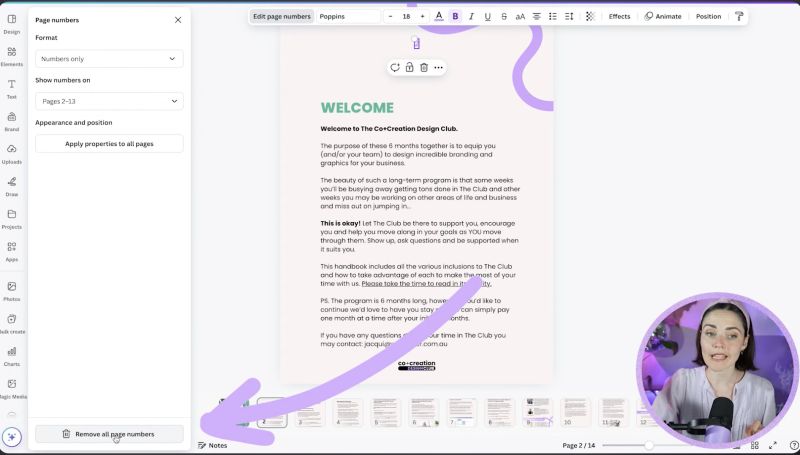
Welcome, creatives and business owners! If you're using Canva to create multi-page documents like workbooks, presentations, or reports, you know how tedious manual page numbering can be. Exciting news: Canva has introduced a new feature to automatically add page numbers! This tutorial will guide you through the process of adding, customising, and managing page numbers in your Canva projects.

Why Add Page Numbers in Canva?

Page numbers are essential in multi-page documents for navigation and organisation. Whether it's a simple three-page worksheet or a detailed 200-page report, numbering ensures your content is structured and easy to follow.

Step 1: Access Your Canva Project

  • Open Canva and navigate to the design you wish to add page numbers to. This could be any document with multiple pages.

Step 2: Locate the Page Numbers Feature

  • Click on the Text tool. Here, you'll find a new Dynamic Text option, which includes page numbers. Select Page Numbers to start adding these to your document.

Step 3: Automatically Add Page Numbers

  • Once you click on the Page Numbers option, Canva will automatically insert page numbers across all your pages. These appear at the bottom of your pages by default.

Step 4: Customise Your Page Numbers

  • Format: Decide how your page numbers appear. Options include simple numbering (e.g., 1, 2, 3) or detailed (e.g., Page 1 of 10).
  • Style: Click on the page number to change the font, size, or colour, tailoring them to suit your document's design.

Step 5: Apply Format Across All Pages

  • After adjusting a number, choose Apply Properties to All Pages. This ensures any changes in font or alignment are consistent throughout your document.

Step 6: Exclude Page Numbers Where Necessary

  • You might not want page numbers on certain pages, such as a cover page. Use the Show Numbers On tool to remove numbers from specific pages while keeping them on others.

Step 7: Manual Positioning for Advanced Designs

  • If your design requires different positioning for left and right pages (common in print documents), manually adjust each page without using the Apply to All option. Use rulers within Canva for precise alignment.
Support Jacqui Naunton // White Deer

Your support helps me produce more content like this. If you enjoy the content I make - like, follow or subscribe!

Subscribe on YouTube

Step 8: Removing Page Numbers

  • If you wish to remove page numbers altogether, select Remove All Pages from the page number settings to delete them from your document.

Final Thoughts

The introduction of dynamic page numbers in Canva is a huge time-saver and greatly improves the functionality of your design projects. Enjoy experimenting with this new tool, and let your creativity shine! If you have any feedback or creative applications of this feature, feel free to share them in the comments. Happy designing!

Jacqui Naunton // White Deer